Paper pieced leaves make great table runner

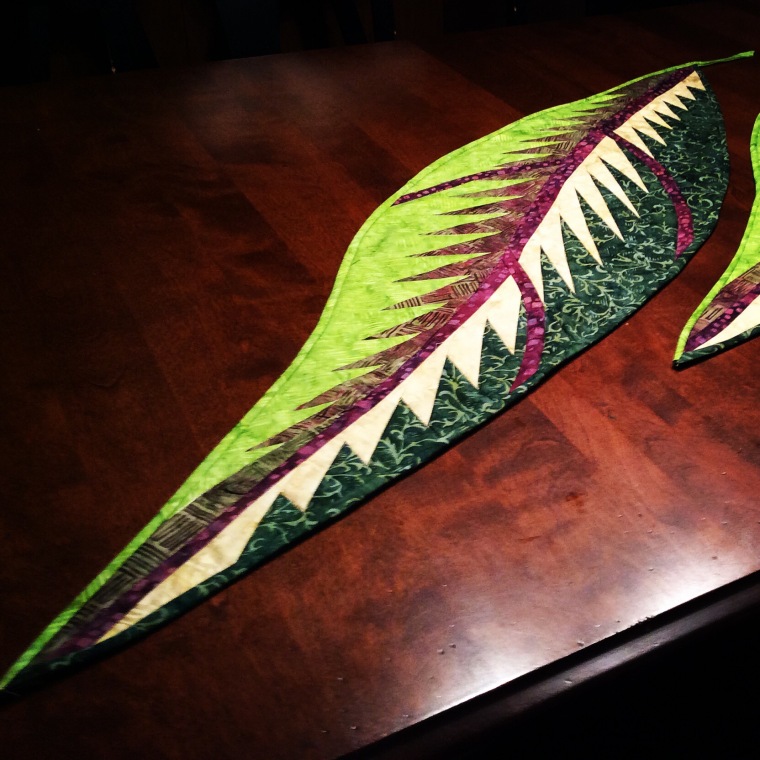
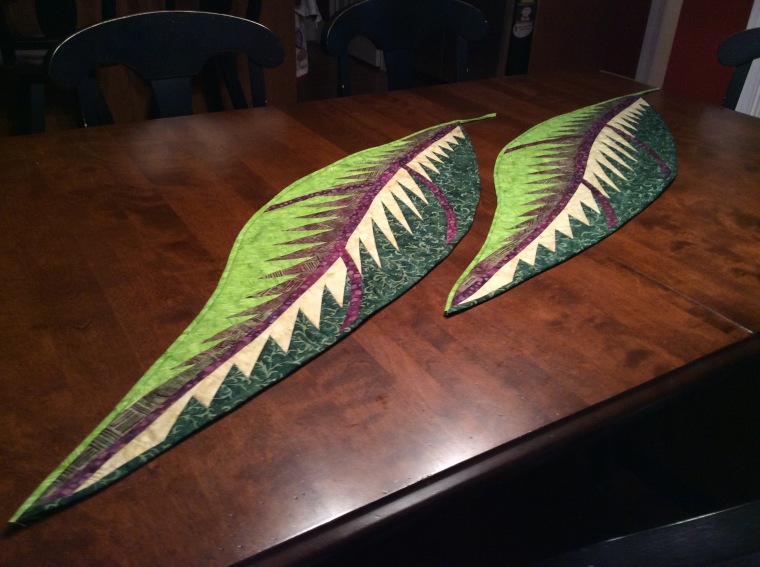
If you’ve never tried paper piecing, I urge you to give it a go. It’s a lot of fun. I wanted a challenge so I bought this leaf pattern from Quiltworx. It was expensive. When I opened it and saw the instruction booklet, I let it sit for a few months. It was so intimidating. When I finally urged myself to create it, I was thrilled with the result.IMG_0251

The pattern calls for enough fabric and paper to make the two leaves. I made both at once, knowing I wouldn’t want to go back and do all that cutting again. Take your time, read all the instructions first, and follow them thoroughly. You’ll learn to sew curves, and glue baste. I had never done either before and I was so pleased how these leaves turned out.

I had a few questions during the binding portion. I emailed Judy Niemeyer, who owns Quiltworx and created all the gorgeous, intricate patterns. She responded immediately and helped me stay on track.

I stitched in the ditch around the veins so it wouldn’t take away from the beauty of the finished product.

IMG_0253I love the way these leaves came out. Don’t you?

Corded fabric bowl from scraps

Corded fabric bowl from scrapsI’d seen corded fabric bowls on a Facebook sewing page and thought, how hard could they be? They looked fabulous. I had to give it a try.

I found this tutorial on You Tube and it is really good. I would suggest you follow it. I made a left turn. I should have stayed the course. 


 The object of the game is to buy clothesline (I got mine at Walmart) and wrap half-inch or so WOF scraps around it. You use a regular foot and a zigzag stitch to hold the clothesline together and create the bowl.

I wanted to use up the scraps that were leftover from this table runner that I made from a jelly roll. I cut the strips in half, but I probably should have halved them again. They were a bit too fat.

Make sure you have a good base for your bowl. 


The first time I made one, I started shaping the bowl too soon and ended up with a narrow base and a wobbly bowl. In addition, when you start to craft the bowl, be sure that you are turning it up to the left of your machine so it doesn’t start to grow under the throat. I made that mistake the first time too.

Also, be prepared for the bowl to have a very scrappy, threaded look, unless you cut your fabric on the bias. It will start to shred and untangle as you wrap it around the clothesline.

So, what do you think? Do you like my corded fabric bowl? Will you make one yourself? Let me know in the comments.

French braid table runner

french braid table runner

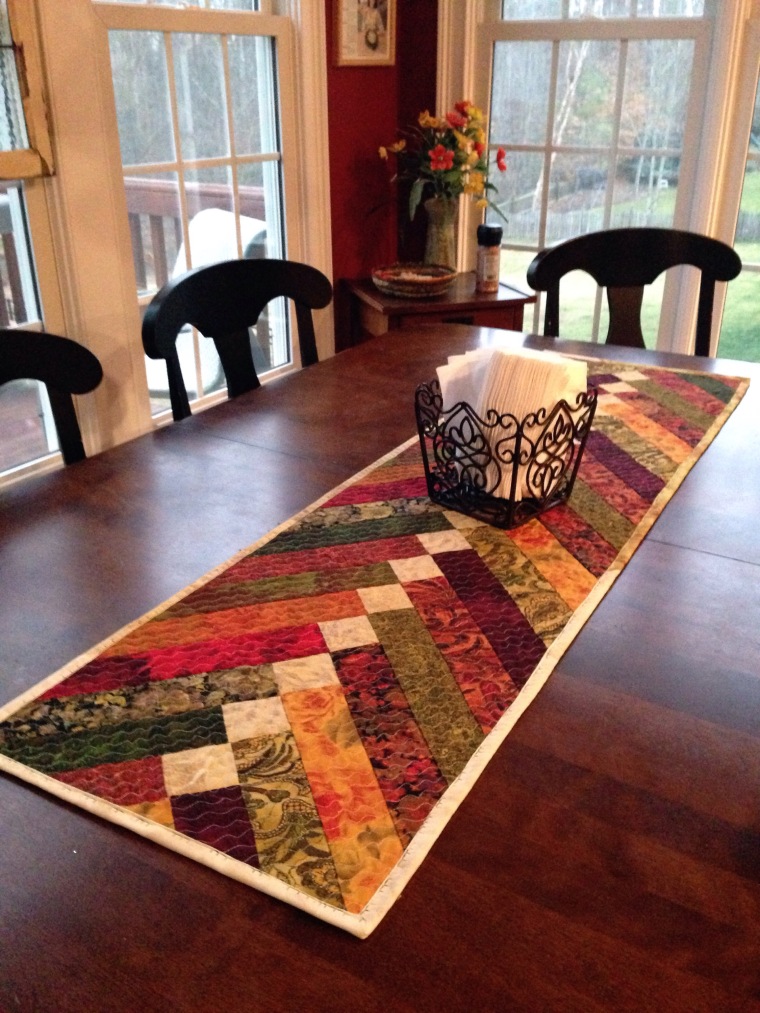
When I asked my sister for fabric for Christmas, I really didn’t know to expect. I wanted to try some different patterns and create some easy projects. She gave me two jelly rolls. After opening this one, and seeing how perfect it matched my kitchen, I scoured the internet for a table runner.  I decided on a a variation of a french braid.

Most french braids have pointed ends, and have a diamond in the middle. Here’s a tutorial from Jenny Doan at the Missouri Quilt Company if you want to follow that idea. I wanted a rectangle. And, because I only had jelly rolls, it would be difficult for me to make the large diamond in the middle. I made my own version.

I started sewing pieces together, using the light 2 inch square in the center. If I had followed the tutorial, I probably would have been more efficient with my fabric. As you can see, I ended up with longer and longer pieces. I started using shorter pieces to preserve fabric, but then I was concerned the table runner wouldn’t be wide enough.
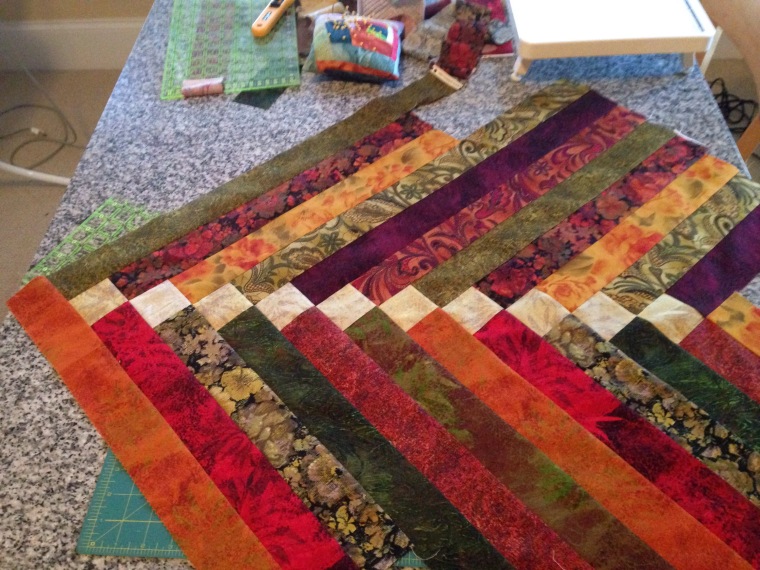
IMG_3198Once I measured my table, and a table runner I already had, I settled on my width and length and squared it up. I used the leftovers to make a simple backing, and pieced together enough light pieces to make the binding, which I machine sewed.
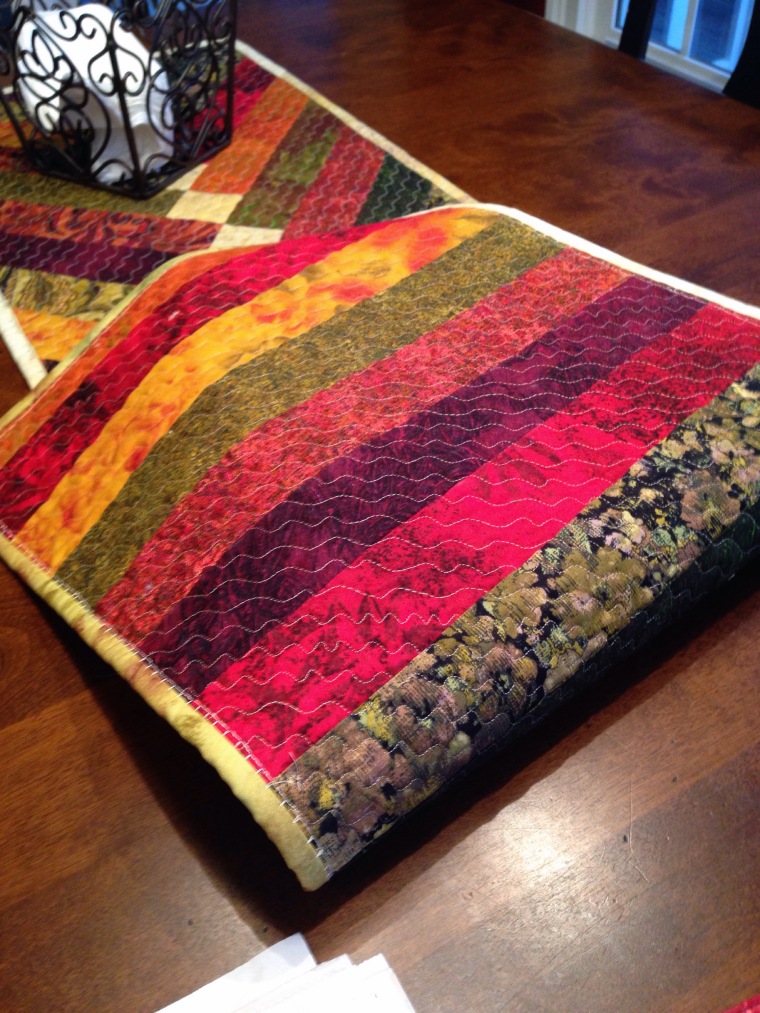
IMG_3357On to the quilting. I had taken Crafty’s Creative Quilting with Your Walking Foot (This class is my all time favorite so far – Jacquie Gering is an excellent teacher.) One of the more fancy stitches she recommends is the serpentine stitch. At first I thought I would do it both ways, crossing at the middle. But after finishing this table runner, I had enough. Straight line quilting is a bit tedious. And, even though she makes it look easy, believe me, it is not.
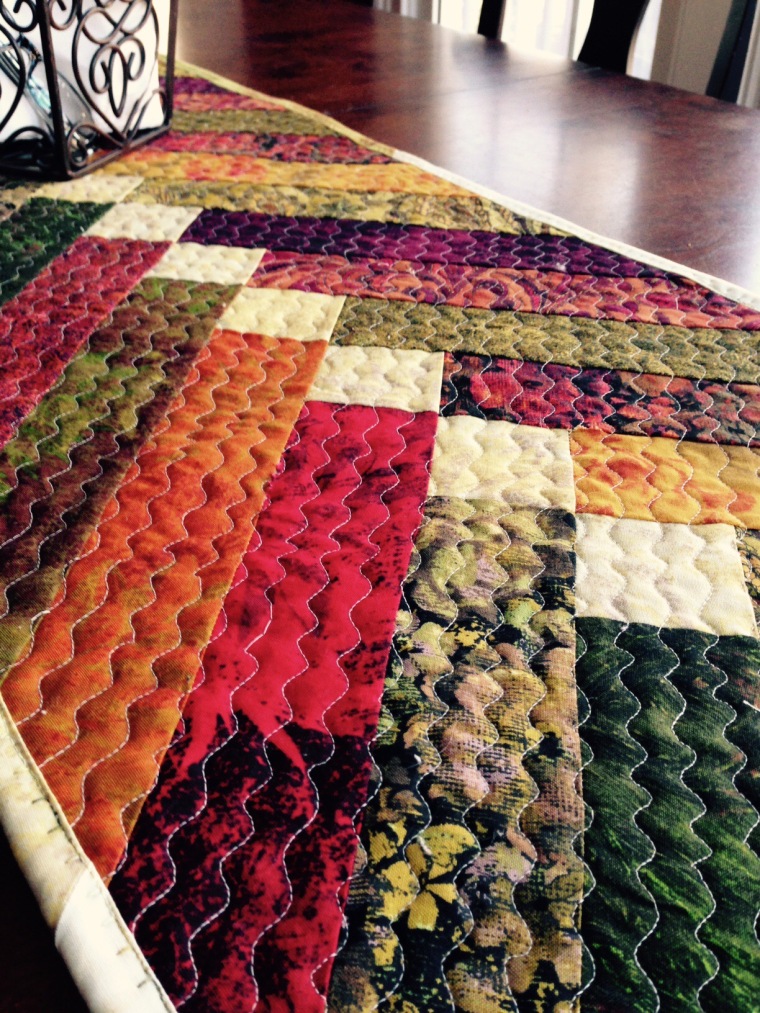
IMG_0271While I can see all the mistakes -the stitches are uneven, and a bit wobbly, – I think the overall look of the table runner is very consistent. And I love the contrast between the thread and the fabric.

This table runner is proudly displayed on my kitchen table. How do you like it?

french braid table runnerNext I’ll share what I did with the leftover scraps.
Fabric box DIY

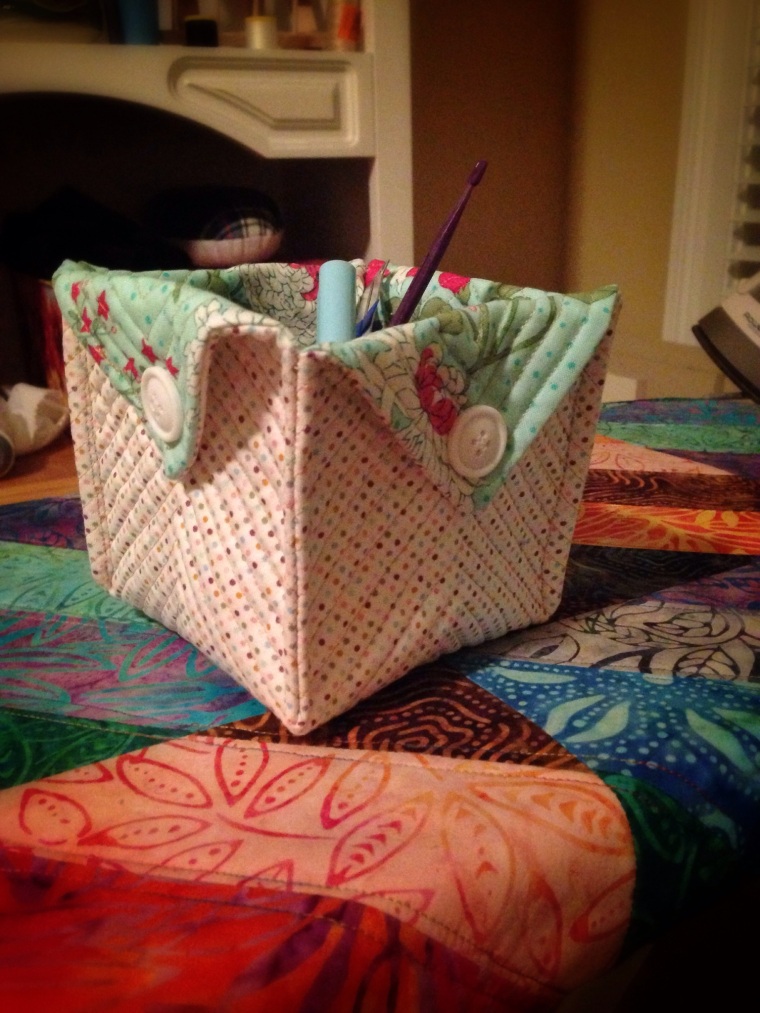
This fabric box was so much fun to make. I used scraps and this excellent free tutorial I found at Seaside Stitches. I use it to keep my notions in next to my sewing room.

The fabric box was a quick, easy to make project, and allowed me to brush up on my straight line quilting skills that I learned from this Craftsy class. It’s titled Creative Quilting with Your Walking Foot. Jacquie Gering is a great teacher. I would definitely take more of her classes.
IMG_3013-0.JPGThat’s my ironing board underneath. Another free tutorial. I used a Batik Jelly Roll called Over the Rainbow. Here’s the tutorial from Moda Bake Shop.

Happy sewing!


Patio curtains – DIY from drop cloths

My back porch is one of my favorite rooms in my house. It’s fully screened, has comfortable furniture, and it’s where I want to be to read a book, have a cocktail before dinner with my husband Peter, or just take a Saturday afternoon snooze. Trouble is, that’s exactly when the sun is at full blast. We’ve been struggling to come up with a way to block the sun for those few short hours. Curtains are an obvious choice, but the amount of fabric I would need makes them ridiculously expensive. We tried bamboo shades from Home Depot for a while, but it just ruined the whole look and feel.

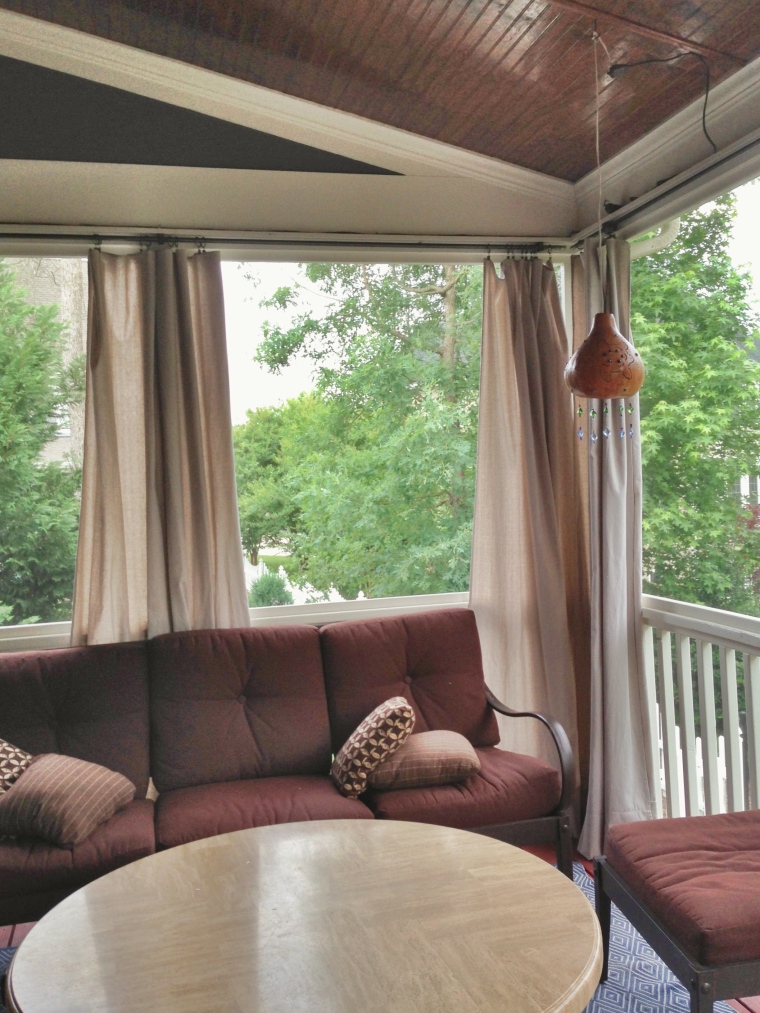
When porch weather rolled around again this year, I took up the charge once again. And this time, I found a great option. Drop cloth curtains. Who knew they could work so well?

drop cloth curtains

I followed the instructions I found here for buying, spraypainting, and installing the hardway. We purchased our drop cloths at Home Depot over Memorial Day weekend. What a steal! Packages of 2 drop cloths were $10 each! And, get this, it was buy one get one free! We walked away with 8 9-feet curtains for $20!!! The most expensive item was the hooks to hang them. We need a lot of them. But I am okay with that expense because it will work with whatever curtains we use now and in the future.

I’m still experimenting with tie backs, and haven’t yet hung them all. But I was so excited that I had to share. Now, there is a chance that these curtains will get moldy. But at $2.50/curtain, can I really complain? I’ll just get new ones next year!


DIY Patriotic wreath

I admire anyone who’s crafty, and that includes my husband, who has turned his artistic abilities into a career. I want to be crafty too, and love the feeling of accomplishment and pride I get when I create something with my own two hands. All it takes is practice, I always remind myself. So, if it doesn’t come out great the first time, I will not give up. The more I create, the better I will be.

When I saw this beautiful patriotic wreath on Positively Spendid’s blog, I was inspired to give it a try. She made it look so simple. My version is not nearly as nice as hers, but it ain’t half bad.

20140531-133521-48921873.jpg

I couldn’t find the exact same ribbons she used, so went with what A.C. Moore had in the store. I didn’t realize my red was transparent, but I think it worked well when I wrapped the whole wreath.

And, I skipped gluing on the wooden stars in favor of a preprinted blue ribbon. I just wish it was thicker. I think mine was about 1.25 inches, as opposed to the 2 inches that was recommended. I just could not find the 2-inch ribbon in the store.

What do you think? Will you take a stab at creating your own patriotic wreath? If you do, please share a photo! I’d love to see it.